Now we've got a good understanding of why we do what we do, we can now move on to consider the steps required to prepare topsoils yourself (for mixing with various types of media, compost being the most commonly used)! How we start to go about this will depend on their physical condition. “As-dug” topsoils consist of soil clods (larger than 10 mm) set within an earth matrix (less than 2 mm), together with stones of different sizes. The objective in preparing soils for use in producing growing media is to first break up soil clods by fracturing and crumbling these, in order to maximise the proportion of the earth matrix, as well as to remove stones. The prepared soil should have a uniform, loose and friable consistency.
While the process may appear involved, please believe us when we say that it is absolutely necessary or else we wouldn’t put you through it! Rest assured, we are not asking you to do anything that we haven’t done on countless occasions: headphones and a good playlist help…
Where topsoils are being taken from your own garden, it may be possible to rotovate these before they are excavated. If this is carried out carefully (under favourable moisture conditions), it can eliminate the need to break up (by hand) soil clods and the demand for sieving. Rotovating can be damaging to structure if the soils are overworked and the presumption should be to use a low speed setting, and carry out a single pass to avoid this (high speed settings needlessly pulverise the prized aggregates)! Be sure to excavate rotovated soil as soon as possible afterwards to ensure it remains loose and friable, and to avoid standing on the rotovated soils in the course of excavation (in order to avoid compaction).
If no rotovator is available, it will be beneficial to “dig-over” (think of a repeated “slice” action) the topsoils thoroughly in the course of excavation. This will reduce the size and minimise the number of clods that need to be broken up by hand.
“As-dug” topsoils from elsewhere can be problematic if they have been excavated in bulk. At this point you may come to wish you had disregarded our advice and opted for manufactured topsoils that appear as if they would flow through an hourglass! You may even start to regret ever listening to us… However, be in doubt that we've faced this challenge ourselves when setting up larger container gardens for customers, and the phrase ‘I’ve got some topsoil round the back that you can use’ always fill us with horror! In this case, placing the soil as a layer on a hard surface allows the soil clods to be broken down using the flat surface, for instance - the back of a spade. This is hard work but strangely rewarding, as something so unpromising almost invariably produce something useable (although blocks of subsoil can be disregarded)! Beware any large stones masking as clods of topsoil as hitting these hurts more than would be expected...!
Soils clods which have somehow survived the onslaught of cultivation need to be broken up by hand. Wear gloves to do this as they are quite abrasive and goggles are good idea, too. The time and effort to achieve an acceptable end-product will be influenced to a large extent by the soil’s moisture content. When this is correct, clods will crumble with minimal force, compressing when they are too wet and resisting considerable force - before shattering - when they are too dry. It’s generally better to place wet soils in a shallow pile on a surface to dry, mixing soils which have dried on the top back into soils below, regularly, to speed up the process. Soils which are too dry should be placed in a shallow pile and watered with a sprinkler hose or watering can; this may be need to be repeated if they are very dry. It will rarely take less than a day or so before drying or wetting soils produces the improvement necessary to continue with preparing soils, but it is definitely worth the wait to get the right result.
While you will no doubt quickly work out your own technique for breaking up the clods, we find that simultaneously compressing and moving the clods sideways in your palms is usually most effective. A new pile of crumbled soils should be formed away from what you produce, and any stones, roots and fragments of turf should be discarded. Earthworms should be carefully removed and rehomed, but not those spiteful-looking grubs and larvae!
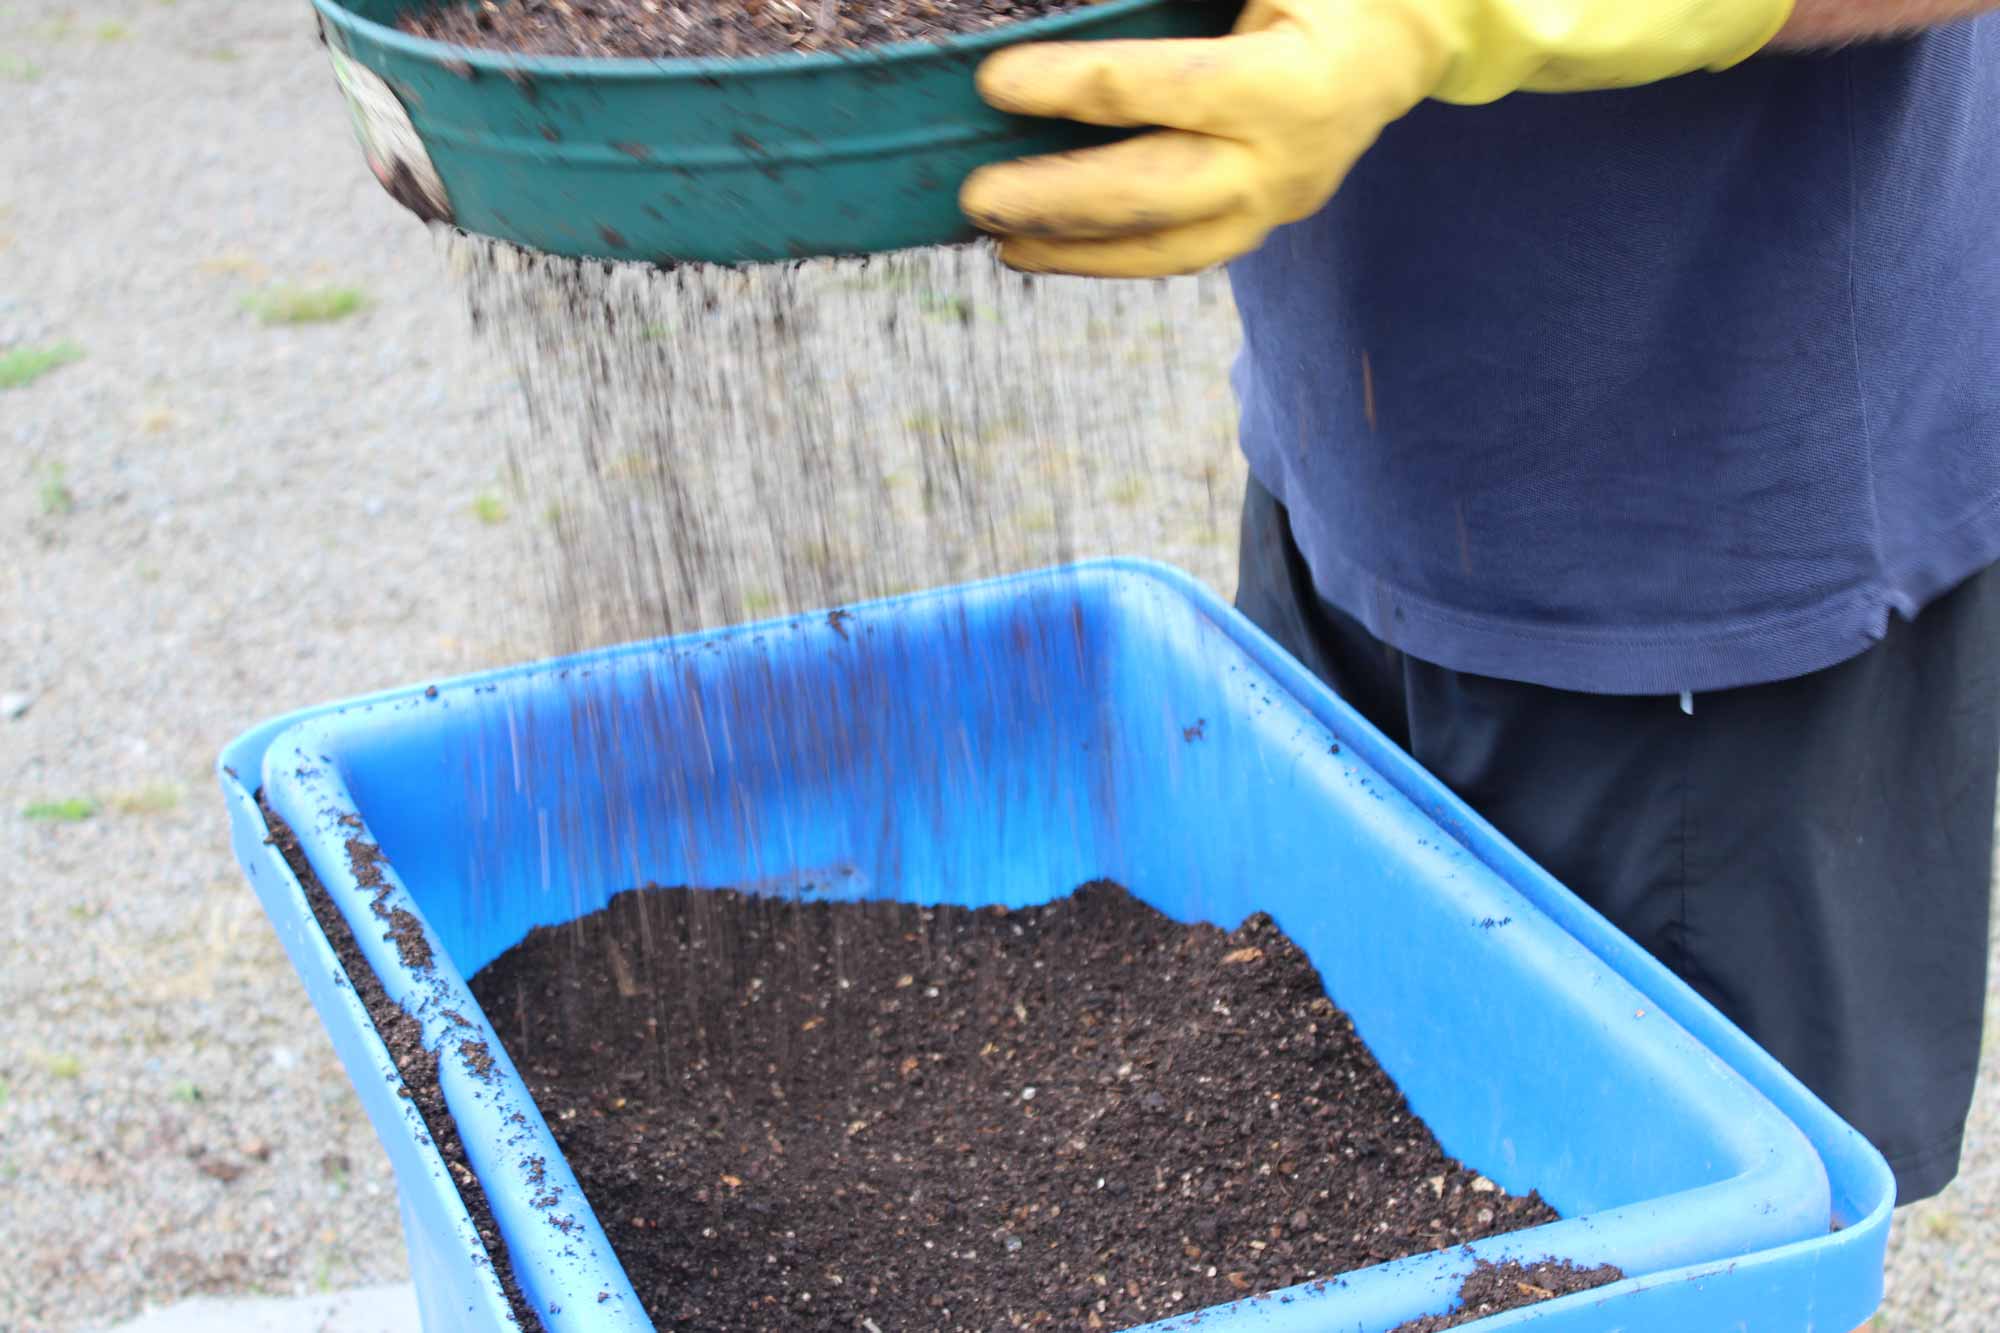 The crumbled soils should ideally be sieved in order to remove clumps of topsoil and any remaining small stones and roots. The dimensions of the wire mesh are important and this is something we’ve experimented with. We use an 8-9 mm wire mesh, having found 10-12 mm to be too course, and 6-7 mm to be too time-consuming (what it produced was better still than an 8-9 mm mesh!)
The secret of sieving is not to overload the sieve (its doesn’t speed things up) and to remove any roots and pieces of vegetation regularly as these choke the mesh (suddenly you’ll be working with a mesh half the size). Gentle side to side movement is all that is required. Once the majority of the contents of the sieve have passed through, we crumble up clumps by hand and briefly sieve these, too. Any resistant clumps, stones, roots and pieces of vegetation should be discarded.
We would suggest sieving over an Ergrownomic planter as this provides a comfortable working height (put the geotextile panel temporarily in the base but not the stone filled mesh bag). This also allow you to determine when you’ve prepared sufficient soil, this being when each container is approximately two-thirds full - at which point you’ll have completed the hard part!